 |
|||||
 |
|||||
|
FILM & VIDEO |
|||||

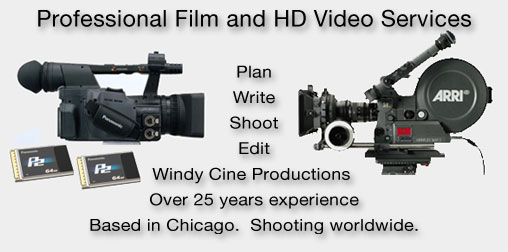

Chicago HD & Video Production
Chicago Film Production
HD Digital Post Production
Master to Tape, DVD, iPod
or put it on your website.
SHOOTING YOUR HD VIDEO PRODUCTION - HOW WE DO IT
PRE-PRODUCTION PLANNING ••••• VIDEO TAPING AN INTERVIEW
OR SEE IT ALL ON THE WINDY CINE BLOG...
Chicago HD Video Production, Film Production and Post Production Services
for Television Broadcast, Tape, DVD, iPod or for the web.
CELEBRATING OVER 30 YEARS IN BUSINESS
Shooting a Film or HD Video in Chicago? We can help make your Chicago Production experience a very memorable event! Currently in Chicago it is:
Windy Cine Productions is a Chicago video production, film production and post-production company, producing award winning commercials, corporate video and documentary style projects. Windy Cine, Ltd is an Illinois corporation and was established in 1980 with offices in Chicago and Lake Forest, Illinois
This website was created in 1999 and last revised on August 6, 2012.
AND FILM OR VIDEO PRODUCTION TECHNIQUES
A mostly serious, somewhat tongue in cheek, guide to help you think about your future marketing or promotional film. Below we have included some common things for you to consider when developing a film or video project.
1. Who is the audience for this video production?
Is your audience already familiar with your work or are you trying to reach a new audience. Is this a one-off screening (for an event) or will this project have a shelf life of several years? Straight to DVD or CD-ROM? iPod or webvideo? Maybe it is a vanity project for the boss? If that’s the case everything is a great idea and budget is no issue.
2. What do you wish to accomplish with this video production?
“It’s a floor wax AND a dessert topping,” an old Saturday Night Live sketch once said. It is very hard to create a film that covers everything for all audiences. While it might seem like a no-brainer to have one film serve multiple masters, our experience shows that it rarely pans out that way. Leave the two-fers to the late night comedians, the film and video production to us.
3. Can you extend the “shelf life” of this video production?
Yes, but you must have that in mind before shooting begins. You don’t want to interview an employee who in a year will no longer be with the company. You also want to be aware of any future name or logo changes. Those TV commercials featuring Tommy Lee Jones for SBC/Ameritech have been gathering dust since ATT took over the company.
4. Can you write the script for this video production?
Your corporate lawyer might write great briefs, but clear, concise voice-over copy is probably not his forte. If you have good ideas, we can take it from there and work with you to create a script. Windy Cine Productions writes, produces, directs, edits and finishes your film or video production. We are one stop shopping.
5. Where do you shoot this video production?
If a trip to Tahiti or Tuscany is out of the question for your film, then we need to decide if we shoot at your location(s) or on a stage. These decisions all impact the budget of course. If budget is no concern, we vote for Italy!
6. When does this video production need to be finished?
Is there a real deadline- this film screens May 1 in Las Vegas at our annual conference- or an arbitrary deadline? We will work to your schedule, but our goal is always to make you happy. Having to rush to meet an arbitrary deadline is frustrating for everyone. Conversely, if your film does screen in Vegas on May 1, contact us as soon as possible, so we don’t have to make like Ocean’s 11 and black out Las Vegas to C.Y.A.
7. Who will be in the video production?
Assuming Brad and Angelina are booked or adopting more kids, we are probably casting with local actors (which need to be paid union wages if they are in the Screen Actor’s Guild) or using people from within your organization to appear on camera. Our years as producers for film, video and television commercials in Chicago are a testament to our casting ability.
8. What video / film format will we shoot with?
No jokes here. We can shoot any format from digital tape, to film to HDTV. It all depends on your budget. We could probably create a pretty effective shadow puppet presentation given ample time and a good flashlight.
9. What about recording sound for this video production?
Really no jokes this time. We think good audio is perhaps more important than good pictures. Have you ever seen a poorly dubbed foreign film? It’s unwatchable. We spend a lot of time and effort recording the best audio on set as we can, then in post-production we focus on the sound design.
10. What release formats do we need?
Is this going to be on the web? Is it a leave behind during sales calls or will it be screened in large auditoriums. All of these choices impact the budget. We can delivery whatever you need, even VHS which Variety recently declared a “dead” medium. (Sorry, Dad.) Most frequently we create a broadcast quality digital video or Hi-Definition master and DVD copies.
11. Do we need voice-over narration?
Usually promotional and marketing films have a voice-over person. It can be the voice of God- like James Earl Jones, or someone you select from within your organization. Again, our 20+ active years in the Chicago Film & Video community allow us to present the best talent options for you to choose from.
12. What sort of on-screen graphics can the production have?
Again we can do anything. Putting someone’s name on the screen to accompany their on-camera interview is relatively easy to do and included in our basic editing rates. However, if you want moving graphics, specialized fonts and the whole George Lucas, “Whiz Bang” (not the technical term) we will work with you to come up with something you like on a budget you can afford.
13. We have a lot of old photos and video we would like to use. Can you do that?
Sure. Though it is our experience that “a lot” is never enough, and the image quality might be fine for the family holiday letter (sorry again, Dad) it might not be up to your most important client’s taste. Let us look at it and see what we can do.
14. What do we do with unused elements from this video production?
Keep it in a safe place and start your own library. No kidding! You would be surprised how often we can use archived footage five or more years after the original production. We often make DVD copies of all the footage we shoot for your archives.
15. How long should it be?
The question we get asked most often (after “Are you sure we can’t get Brad and Angelina?”) Our stock answer is “It should be as long as it is good.” For the Internet this probably means five or fewer minutes. Our goal is to leave the audience wanting to see it again. If that is the first response, your production has been a success.
TALES FROM THE FRONT
Our goal with this serialized production guide is to share with you some of our production experiences while helping you create your own video projects.
Chapter 1 - Selecting a Location to Shoot Interviews for Video or Film Production
We often shoot in hotels. Conference rooms can work, but they are often in crowded areas. Last January, we were shooting for two days in Washington D.C. The day before the shoot, the hotel insisted we change rooms, but wouldn’t tell us why. Finally, the manager told us the whole story. The President and Bono (an uncommon pairing to say the least) were speaking at the hotel the next morning. Our shooting location was going to be their green room. Another lesson learned that day… The Secret Service prevents all deliveries to where the President of the United States is speaking. Our “by 10:00 a.m.” delivery was closer to 2:00 p.m.
When selecting a room to shoot the interview for your video production, larger is better in almost all cases. I usually request a 20 x 30 foot room in a quiet wing of the building. Try to avoid a room near an entrance or exit, as well as an elevator, bathroom, public telephone, vending machine or any other noisy distraction. Check to see if you have plenty of working outlets in the room. Make sure you can turn off the room lights when you are shooting. Prior to the shoot day, scout the room you are shooting in and check to see if any of these conditions exist. Most rooms have a fan for heating and air conditioning. Make sure you can turn the fan off when shooting and back on between interviews. Sometimes you will have to contact the building engineer for help with this. Fan noise is really bad, and more noticeable once you get into the editing room, so eliminate this problem before you shoot.
Also, check for noise outside the building itself. The sound of a toilet flushing is not so good when the CEO is making a point, but fire or police sirens are far worse. Being near the loading dock and the “beep, beep, beep,” of a truck backing up is not a good thing nor are buses and airplanes. Make sure the landscaping crew is off on the shoot day. Now, sit in a chair where you would position the person for the interview and close your eyes and listen. If you eliminate the fan noise you will be in good shape. You can always wait for that noisy motorcycle to pass.
Look for a comfortable chair for the "talent" to use. Nothing is worse than squirming talent trying to get comfortable. Also, the chair should not swivel or be on wheels. When people start to squirm they start rocking or move out of the light or away from the mic. And swivel chairs can make squeaky noises - not desirable.
Chapter 2 - Setting up Film or Video Production Equipment for Interviews
As we said in Chapter 1 in a best-case scenario you will be able to shoot your interviews in a controlled environment, which you have previously scouted. However, sometimes this is impossible and you have to create something on the fly. A few years ago we were making a film for one of our favorite clients- a company that provides security systems- imagine a high-tech version of plywood board up.
This was one of those jobs where, “If it is Tuesday we must be in Baltimore.” We traveled from Chicago to Philadelphia, where we shot in Philly, Wilmington, DE and Camden, NJ, then down to Baltimore and Washington D.C. (we recommend Pesce in DuPont Circle, if you like fish). In future installments we might tell you about how impossible it is to make a left turn in Camden, or our mad dash across 4 lanes of traffic in a rainstorm to the Liquor Barn, or “Pukey,” who while we were shooting in Philadelphia, deposited his lunch on the sidewalk next to us where we were working. (If anyone needs a high quality barf sound effect, we’ve got it.) We had an interview scheduled at the Philadelphia Housing Authority. We had no scouting time, and there wasn’t an available conference room. So we were forced to shoot in a cramped office. We made the best of a difficult situation. We put the camera out in the hallway and shot through the open door. We moved out interview subject out in front of his desk- so we had some separation from the back wall. While not ideal- and very hard to control sound (phones ringing, etc…) we made it work. When you see the finished product you will never know of our production difficulties. The subject gets about a minute of screen time, much of it covered with b-roll footage of Philadelphia houses using our client’s product, and we shot him in a tight composition so we don’t notice we are in a small office.
Below are the steps we take when shooting single subject interviews. Specific notes and suggestions about the production follow this list, along with a few tricks of the trade.
We usually set up all the production equipment (either film or video gear) in this order prior to the talent arriving. Plan on 40 – 60 minutes of set up time.
o Monitor
o Tripod
o Camera
o Headphones
o Chair for Talent
o Chair for Interviewer
o Key Light with Chimera
o Edge Light
o Background Light
o Background
o Boom Mic for talent
o Lavaliere Mic for Interviewer (optional)
o Set Camera for Color Temperature
o Set Levels for Mics
o 60 seconds of bars and tone
o 10 – 20 seconds test recording video and audio
o Verifying picture and sound on camera playback
o Go to the washroom
o Wait for the talent to arrive
Set up the monitor close to where the camera will be. Plug it in and turn it on. I use an S-Video cable to monitor the camera. Plug it into the monitor and leave the other end handy to plug into the camera. Set up the tripod and level the head. (Tip - I usually set the height of the camera slightly above the talent’s eye level. I feel this gives a better look). Mount the camera to the sliding base plate. Balance the camera weight front to back until it is neutral, i.e. not front or back heavy. Power up the camera and set the color temperature switch to “Daylight”. (We use a 200 watt HMI with a Chimera as our Key Light. Set a rough frame and approximate stop and focus on the lens – more on lighting later). Flip the switch on the camera to output NTSC Bars and Tone. Plug in the S-Video cable from the monitor into the camera and adjust the monitor for correct chroma, hue, brightness and contrast settings. Go here for a detailed explanation on how to set up the monitor:
http://en.wikipedia.org/wiki/SMPTE_color_bars
Scroll down to: “Calibrating a Monitor using SMPTE Color Bars”.
Hopefully, the monitor has been powered on for at least 10 minutes. Settings change as the monitor warms up. It’s probably a good idea to check it again right before you start shooting. This is a good time to plug in the headphones to see that you getting sound from the camera.
Get a couple of comfortable chairs for the talent and the interviewer. Set the talent’s chair 10 – 15 feet away from the camera and mark the position of the legs with some camera tape on the floor – (see the shooting diagram). Place the interviewer’s chair so it won’t be in the shot, but as close to the camera axis as possible. This way the talent will be looking more directly at the camera and we will see the talent’s eyes more clearly.
Next, set up and place the light stands in their approximate positions. Put the lights on the stands and plug into a working 120 volt / 15 – 20 amp outlet or extension cord. We use a Mole-Richardson DigiMole 200 watt HMI with a small Video Pro Chimera (24” x 32” with either the 1/4 or 1/2 grid cloth inside) for our key light. This is a daylight balance light (5600º Kelvin). We also use 2 Mole-Richardson Tweenies lamped with 300-watt tungsten bulbs for our edge and background lights. Use a couple of pieces of Rosco CTB Full Blue Cinegel and clothespins to bring these tungsten balance lights (3200º Kelvin) closer to the daylight range of the HMI. Rough in the lights, we’ll fine-tune them later.
Set up the background 10 to 15 feet behind the talent’s chair and centering on the camera axis. Raise it up to standing eye level for now – we will fine-tune that later, as well.
Set up the stand for the boom mic. We set it slightly to the right of the talent so it doesn’t make a shadow from the key light. We use a Schoeps mic and a boom pole - aim the mic at the talent’s heart. Get it as close as possible to the talent. Just high enough to be out of frame. We think the Schoeps or a Sennheiser MKH 416 is the best audio solution in this situation, especially with non-professional talent. If you use a Lavaliere mic there is a good chance the talent will touch or make some undesirable noise at exactly the wrong moment. Eliminate this problem by using a boom. Plug it into the camera with an XLR cable. Check with the headphones to see if it is working. Again we fine-tune it later. If necessary, set up a Lavaliere mic for the Interviewer. With another XLR cable plug it into the camera’s Channel 2 audio input. Check out this mic as well.
With the lights roughed in, have a stand-in for the talent (approximately same height) sit in the talent’s chair. Move the chair left or right to center for the background. Raise or lower and / or move left or right to adjust the Key Light. The stand-in should have a slight shadow under his nose with a fall off of light on his camera right side and good spectral highlights in each eye. Now zoom the camera in to full frame on the stand-in’s face and push the exposure button. Check the lens and see if the T stop is T2 or a little less. If it is wide open, like a T1.8 move the Key Light in 12” and re-set and check exposure again. If it’s higher than T2, move the light back and re-set. A T2 or a little less is a good stop to shoot because the background will be out of focus. Adjust the edge light with the tough blue gel on it to help separated the talent from the background. The background light can just be a little glow around the subject or it can be a slash. Or if you in a smaller room the key light may be falling on the background so just turn it off. We prefer to shoot with the background being a darker value than the talent’s exposure – at least a 1/2 to a full stop. We use dark backgrounds to help keep the value lower than that of the talent.
Now would be a good time to white balance to camera. Have the stand-in hold a small white card about 8 x 10 inches - like a piece of white printer paper - in front of his face. Zoom in until the card fills the frame. With the exposure button, set the proper exposure. We use Warm Cards – either a +1 or a + 1/2. Hit the white balance button. On our camera we get much better flesh tones using Warm Cards.
Go here for more info on Warm Cards: http://www.warmcards.com/
After you have white balanced the camera, tell the stand-in to lower the Warm Cards so you can re-set exposure on his face and then carefully check the focus. Then zoom out and re-set the frame. Carefully check the frame – no light stands or mics – good! Now drop in a new blank videotape and flip on the bars and tone generator on the camera. Check to see if the audio levels are correct and the timecode is set properly. We shoot 2 hour tapes and set timecode to 1:00:00:00 (drop frame) on roll #1. Roll #2 becomes timecode 3:00:00:00 and so on. While you are recording 60 seconds of bars and tone, re-check the monitor. Adjust it if necessary. Stop the tape after one minute and then shoot 20 seconds of the stand-in. Have the stand-in count to 10 or talk in a normal voice. Verify the picture and audio with the monitor. How does it look? How does it sound? If everything is okay, leave everything on. Hit the john, get a bottle of water and put a chair by the camera and wait for the talent to show up.
When the talent arrives, have him sit in the chair and swing the boom mic back into place. Check the lighting and sound. Peter always asks a few “throw away questions” that we record and check with playback. If it sounds good and looks good, you are good to go.
Chapter 3 - Conducting the Interview
A few years ago we were asked to produce a pair of national TV commercials for a big ad agency. Jim and I have done lots, LOTS of household product spots. In fact we joke that if it cleans you or your house we have probably shot it. For a while one of our biggest clients was SC Johnson. We had good relationships with some key agency people and even ended up producing spots for them at different ad agencies.
This time we were asked to shoot real women, documentary style, talking about a new SC Johnson product, which could clean your house without leaving any odors or residue. For two days we shot 20 women who had been using the product and asked them about their experiences. The goal of course is to get that gem of a sound bite, “If you don’t believe me come to my house and see for yourself,” or something like that. Getting that gem is much easier said than done. You need to shoot a lot of film to make it sound natural. Also, and this is really critical in any interview situation, you need to take the time to make the subject feel comfortable, at ease, and to create an environment where they can speak freely and not feel judged.
For this job we rented and completely dressed two model homes in a suburb of Chicago. The first home was where our talent signed in, relaxed and got into make-up. Think of it as a 4000 square foot green room with all the amenities of home. The other model home was our shooting set. We dressed and lit several different areas of the house so it would not look as if we were shooting in one location. In fact in the final edit it seems like we shot in 4 or 5 different houses and that we went to the interviewees home, rather than have them come to our set.
When the talent was ready we would bring them over to the shooting house. All unessential crew members went to the basement. The agency and clients were sent to the master bedroom where we created a video village where they could watch and listen to what we were filming. We had a wireless mini earphone plugged in my ear so they could communicate with me via an intercom. They would give me such great tips as, “Try to make them say how much they loved it,” and “Can they be more animated?”
By the time we were ready to shoot all who were left in the room was me, Jim, the talent and a soundman who once he set his mic, left and monitored it from an adjacent room. Considering there were probably 30 people hidden throughout this house, the environment surprisingly felt less like a film set and much more like a person’s home. I would begin the session- which usually took 20-25 minutes- by introducing the subject to Jim and me and by making some small joke such as, “This (pointing at the lights and camera) is pretty much how your living room looks too, I bet, “ and just talking to them trying to get them as comfortable as possible. I would tell them not to worry, just talk naturally as if we were having a conversation.
Since my voice would not be heard in the finished spots, I had to frame questions so their answers would provide context. I could not ask, “Do you think the product worked well,” because their answer would be “Yes,” which gets us nowhere. So I had to ask questions like, “Tell me what you liked most about the product.” To prepare them for this style of Q & A I told them what I always say, “If I ask what your favorite ice cream is, don’t say, ‘chocolate,’ say, I LOVE chocolate ice cream”. That simple example is usually all it takes, then we start the interview with the “easy” ones- what’s your name, where are you from, etc…. This allows camera and sound to make any final adjustments and we can begin the interview in earnest.
So when you need to interview non-professional talent here are some things you can do to make the experience for everyone go a little better.
Create a friendly environment and remove all non-essential personnel. It is bad enough for some people to appear on camera, let alone speak in front of a group of strangers.
Let the subject know how things will go. Show them around the set and introduce them to the remainder of the crew.
Start off the interview with easy questions so you have time to make final adjustments and gently talk the talent into any changes you might need.
Make good eye contact and really listen to them. If they are talking WITH you as opposed to TO you, you are doing a good job.
Like any lawyer in court, do your homework. Know the answers in advance. Don’t be surprised at what they say.
Let them know it is ok to make mistakes and you will ask the question several times and in several ways.
Relax. Its just film (or tape).
Now you have a few pointers…. What’s your favorite ice cream?
Chapter 4 - Storyboards for Film or Video Production
Almost everyone knows what a storyboard is. They are panels, like comic strips, which outline the shots needed to create a scene or even of the entire film. Alfred Hitchcock was famous for his use of storyboards. He would have the entire film boarded in advance of production. For him, shooting the film was a mere formality, and is perhaps why he thought of is actors as “cattle.”
In our film and video business we don’t typically work from storyboards. When we make a corporate video, we create shot lists, and work very intuitively. The documentary style films and videos we have made really come together in our editing room. Television commercials really are the only part of our business where storyboards are a regularly used, and that brings us to this Tale from the Front.
We are big believers of the idea that working begets more work. Many times we have been working on a television commercial, or even a corporate video piece, and just by being in the agency in front of writers, art directors and producers we have been given more work. One such case happened about 10 years ago. We were at a meeting in an ad agency where we had done a lot of car commercials. The agency had a concept for a Camaro Z28 commercial where the car would break out of the winter doldrums and into the sun. They had a storyboard comprised of six frames, one of which was the hero shot of the car. They told us, “We don’t have a lot of money (nothing we haven’t heard before) but a snow storm is going to hit Chicago the day after tomorrow. If we get you a Camaro can you shoot the spot?”
Cut To: Ext. Chicago- Day. Two days later, a blizzard hits. Jim and I and a film camera make our way around downtown Chicago, shooting snow scenes. Anything interesting in the snow we shoot it. Meanwhile the Camaro is in the studio parking lot getting buried under a foot of snow.
Cut To: Ext. Chicago- Day. Three days later, a Friday. The sun is out, the snow begins to melt, we shoot the snow pack melting off the car. When not shooting we book a crew, get permits to close and shoot downtown streets and hire a stunt driver.
Cut To: Ext. Chicago- Day. Saturday, the sun has melted almost all the snow and the streets are clean. We shoot a series of driving shots as the car races up and down the ramps of Chicago’s Wacker Drive and the rest of the Loop.
Cut To: Int. Film Transfer Suite-Day. Monday. The film has been processed and is transferred. We return to our editing room and assemble a rough cut. The six frame storyboard turns into about 40 different shots. We show it to the agency, they like it and decide to spend some money on sound design and music.
Cut To: Int. Living Room- Night, Watching the Chicago Bulls march towards another NBA Championship. At a commercial break the Z-28 commercials appears. Nice.
From concept to finish the process took less than two weeks and the finished spots aired in English and Spanish throughout the spring and were reprised the next year as well.
To see the spot and the original storyboard click here: Camaro Z-28 commercial "Thaw" | Storyboard.
Chapter 5 - Shooting Cutaways or B-Roll
In previous installments we described how we set up, shoot and conduct on-camera interviews for documentary and corporate films and videos. In this tale from the front we will discuss the importance of cutaway footage in any video production.
In 1999 our TV commercial business was hamstrung by a Screen Actors Guild strike. Looking for work we offered the opportunity to make a promotional film for a Chicago area not-for-profit, which worked in the inner city and helped families in need. The client hammered out a rough script and it was pretty much what one would expect of a typical fund-raising promotional video, people talking about how great they are and how much they help the communities they served. All of which is very nice, but painfully dull. When we looked at the script it was probably 75 percent talking head interview, 15 percent graphics (statistics) and maybe 10 percent moving pictures. To us this was all backwards and when we accepted the job asked the client if we could make some changes to their script.
We proceeded to turn the images to interview ratio upside down. We decided to shoot this promotional film as a documentary. We would show the good works they did, loose the statistics completely and tell the story with pictures. Our interview subjects would push the narrative along with the answers to our questions. Ideally, we hoped to not even use a voice over person, though it turned out there was too much historical information as well as hard facts that needed to be presented concisely to do that. The result is what we call an Infomentary- part informational, part documentary and NO part “industrial” or “corporate” film. Our goal was to make the film interesting to watch, believing, if we could get viewers hooked on the images, it would help open up their checkbooks. Sure enough it did. Recently we showed the film to a perspective new client, and seven years later it holds up.
The only reason we could make the film in this style was that we shot lots, LOTS of cutaway footage. Cutaways are those scenes (or even still pictures) that you use to cut away from a subject. In film and video productions you often cut away from an interview subject to condense a story or to make the subject sound better. Recently we were editing and by using a cutaway were able to change someone from speaking in the present tense, to speaking in the past tense by substituting the word “was” for the word “is.” We were only able to do this because we had images to cutaway to.
One of the scenes in the film mentioned above was shot at an HIV/AIDS respite facility. Located in a church on Chicago’s west side, a minimal staff ran daycare and head start programs, provided respite for families dealing with HIV/AIDS, ran a monthly food distribution program and held art therapy sessions for families in need. The day we shot was in the middle of summer, maybe 90 degrees outside and it was the one day a month all of these programs occurred at the same time. We got to the location in the morning and shot all day. Late in the afternoon we did an interview in the stifling church sanctuary with the art therapist- who also ran the food distribution service. He was tired, sweaty and exhausted. If time and budget not been a concern would should have come back another day for his interview, but instead we went forward. Very quickly it was clear he was tired. Every other word he spoke was “Uh” or “You know.” We were very concerned, but at this point had committed and we felt we could save it in the editing room because we knew we had really great cutaways to choose from.
Cut to a month later. We screen the film for the client. They love it. Mr. Art Therapy came up to us and told us how much better he came off than he thought he would. It was all due to the cutaways.
Things to Consider For Your Film or Video Production
1) If you can shoot the interviews first and then get cutaways later, it is often easier because you know what the subject has said, and how much time you need to fill.
2) Shoot lots of footage. Try to shoot scenes that can tell a story visually. In the example above we shot the food being delivered to the church, volunteers unpacking it and then re-packing it into family-sized bundles, the families coming to pick up the food, and volunteers helping them out. The entire event took perhaps four hours, and we used maybe a minute of footage, but it told the entire food distribution story, and allowed us to edit the interviews to have the subjects say what we wanted them to say.
3) If using still photographs, make sure you have lots of them and they are in good condition. We are always surprised when clients tell us of the great photographs they have, then show us a picture of the back of someone’s head. Also, it is most effective when you can pan across or zoom into a still picture. These moves allow you more time, and we are in the moving picture business, it makes the scene less static overall.
Editing Film and Video Tape
Chapter 1 – The Early Days of Editing
Now that some of the production basics have been covered, it is time to focus on editing. In the last 15 years film and videotape editing has changed dramatically, and today anyone willing to invest in a decent computer and some editing software can call themselves an editor. This was not always the case.
In the early 1990s we shot and edited Victimless Crimes, a feature, on 35mm film. After shooting each day we went to a screening room and 35mm work print was synced to 35mm magnetic audio stock and we watched the previous day’s footage. While we were shooting our assistant editor worked on a Steenbeck or KEM editing flat bed machine (about as large as a queen size bed) and synced the audio tracks to the picture. The picture was then run through the projector while the mag stock was strung up on an audio dubbing machine. (That beep you hear at the “2” frame on a film countdown is called a sync beep and is used as a reference point to lock picture and audio in sync.) After a month of shooting about 75,000 feet of 35mm film we wrapped production and editing began in earnest. While 75,000 feet might sound like a lot of film as feature films go it is not much at all. That is about 13 hours of film shot for the 90-minute runtime. An average Hollywood feature shoots 400,000 or more feet. Despite our low shooting ratio, our footage and the corresponding audio stock took up the walls of two editing rooms. We also used a series of trim bins- portable containers where you hang your film clips- and even #10 envelopes, well labeled and marked, containing 5 and 6 frame long clips. As you can tell organization is as important in editing, as is technique.
For the first 85 years of film history ALL films, including television shows, TV commercials and corporate films were edited in a similar fashion. Editors and their assistants worked in rooms with large editing tables and walls piled high with film and sound stock using splicing blocks, clear tape or editing cement, and lots of colored markers. To watch more than one reel (10 minutes at a time) meant a trip to the mixing stage or screening room.
Videotape editing- either a “cuts-only” systems, or more advanced A / B roll systems, which allowed for dissolves between shots- had been in vogue since the 1970s. All television news organizations would shoot videotape and edit it in bays adjacent to the newsrooms or TV control room. If you have seen the film Broadcast News and remember Holly Hunter racing against a deadline and Joan Cusack running a cassette to the control room, then you have sense of how videotape editing for live broadcast worked.
Cutting videotape was a big improvement over film if you were working on short projects or something disposable, but for feature film editing, sorting through 13 or more hours of video cassettes to find that one clip was just as laborious as searching the wall of film and mag stock. Even on shorter projects when we shot less than an hour of footage, we spent a lot of wasted time waiting for the cassette to fast forward or rewind to the scene we needed. This is because videotape editing, like film editing, is considered a linear editing process. But, by the 1990s computer digital technology was improving so that editing- especially short projects- could be done on a computer.
Two years after Victimless Crimes, we had our first digital editing experience. We shot 35mm film of the performance artist Denny Dent painting a four by six foot portrait of Mick Jagger. The film was color corrected and transferred to Beta SP videotape, and that tape was digitized and loaded into an Apple computer running Avid editing software. Digital editing was in its infancy and hard drive space was expensive so the image on the computer monitor of Denny in action looked something like an impressionist painting. Instead of our beautiful 35mm film, the computer screen showed giant pixels of information. Editing Monet’s Water Lilies would have been easier.
While the computer image was less than ideal, the random access capability allowed with digital editing sped things up considerably. Gone were the days of looking for film reel one, mag tracks 4 and 5, and that envelope of trims you need to splice back together. Also history was waiting for the videocassette to fast-forward to the 51-minute mark so we could grab that one last scene, and whoops! it is not on cassette one, but cassette two. Now, with random access capabilities, a keystroke or a mouse click gets you to any part of your footage you want. Like any digital file you can copy and paste, drag and drop and if you don’t like it, revert back to your previously saved version.
Like all things in the digital world, editing technology changes rapidly. Perhaps six months of our first Avid experience, the images on the monitor improved to VHS quality. A year later we could easily edit a television commercial on our computer and output a broadcast quality version without having to return to an on-line edit suite. A short time later Avid contacted us and purchased that Denny footage to run in their booth at N.A.B. in Las Vegas. Shortly after that, more of our footage was used in the Avid training manuals. And not long after that we opted to change to another editing platform- the Media 100 system. Now we use Apple’s Final Cut Pro System. Today we have three computers used for digital editing. One we typically reserve for graphic and effect work, one for editing the program, creating DVDs and web movies, and a laptop which we can take on location and editing on the set, in the hotel room or at an airport gate.
Over the next few installments we will take you through some of our favorite editing jobs and try to describe our workflow. The first piece will be a television commercial we shot on film, edited digitally and mastered to tape for airing. Second will be about a documentary film shot and edited digitally, but mastered for film festivals and television broadcast. We will conclude our editing chapter talking about corporate projects that end up as web movies.
Chicago Film and Video Production and Post Production Services
For Broadcast Television, Digital Tape, DVD, iPod or the web.
Telephone (847) 234-4700 • http://www.windycine.com/
© 2012 Windy Cine, Ltd.
All Rights Strictly Reserved.